


Hope you already got the idea of how to create forms in PresideCMS. If not, please check out the other blog post Introduction to PresideCMS form builder
Why we need to customize Form builder forms layout?
Customization is the most important part of work on everywhere now in the development of an web applications/sites. Without customizing the form, it looks very odd with the actual application, as both uses different layouts.
PresideCMS provides the feature to customize the forms, that are created using its form-builder by overriding the formbuilder related handlers & views. Also we can create multiple layouts for forms, that can be associated with the corresponding form by selecting the layout through widgets.
How to customize PresideCMS form builder?
-
Step 1 : Overriding handler components
As we seen above, we need to override couple of components in the
Application_Root/application/handlers/formbuilder/layoutsin order to customize the forms ( Similar components should be there in the core by default, which was used as default layout for forms ).
//Form.cfc
component {
    private string function formbuilder( event, rc, prc, args={} ) {
      //Views path
      return renderView( view="/formbuilder/custom_layout1/form/formbuilder", args=args );
    }
}//FormField.cfc
component {
private string function formbuilder( event, rc, prc, args={} ) {
//Views path
return renderView( view="/formbuilder/custom_layout1/formfield/formbuilder", args=args );
}
}-
Step 2 : Overriding / creating views
Also we need to create the views in designated path mentioned on the customized handler(s) above under <Application_Root>/application/views/formbuilder/custom_layout1 Enter below code with your CSS class.
Consider custom layout view folder as <Application_Root>/application/views/formbuilder/custom_layout1.
//formbuilder.cfm

<cfparam name="args.renderedForm" type="string"><br>
<cfoutput>>/cfoutput><br>
  <div class="myForm"><!--- Your Class Name --->
    #args.renderedForm#
  </div>
</cfoutput><!--- /formfield/formbuilder.cfm --->
<!--- As the name itself explain the use of this view page, this will be used as the layout for a single form field. --->
<cfparam name="args.renderedItem" type="string" />
<cfparam name="args.label" type="string" />
<cfparam name="args.id" type="string" />
<cfparam name="args.error" type="string" default="" />
<cfparam name="args.mandatory" type="boolean" default="false" />
<cfoutput>
<div class="MyClass"> <!--- Your Class Name --->
<label for="#args.id#">
#args.label#
<cfif IsTrue( args.mandatory )>
<em class="required" role="presentation">
<sup>*</sup>
<span>#translateResource( "cms:form.control.required.label" )#</span>
</em>
</cfif>
</label>
#args.renderedItem#
<cfif Len( Trim( args.error ) )>
<label for="#args.id#" class="error">#args.error#</label>
</cfif>
</div>
</cfoutput>-
Step 3 : Write your own Style Sheets
Write your own CSS and add those classes to formbuilder.cfm to customize the forms. Also you may need to add proper i18n files and include your stylesheets through stickerbundle.cfc.
Once you're done with the above steps, you need to choose the specific layout on the page, where we're adding the form to a page using widgets.
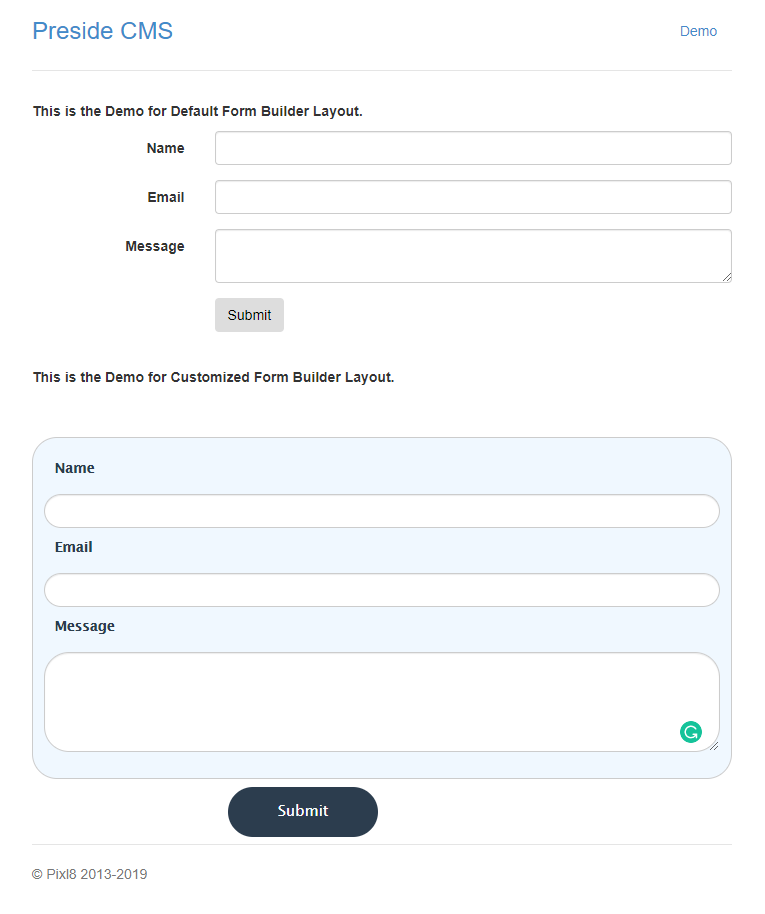
Below is the sample view of PresideCMS default form layout.
And after making the customization, the form should be look like this.